Configure Digital Baskets
MedView Flow Premium
The digital basket is made up of two components: a standard pharmacy basket and a digital tag that clips onto it. You can set up your digital baskets to be used for either manual assignment or automatic assignment using the Digital Baskets Settings.
What's the difference between manual assignment and automatic assignment?
-
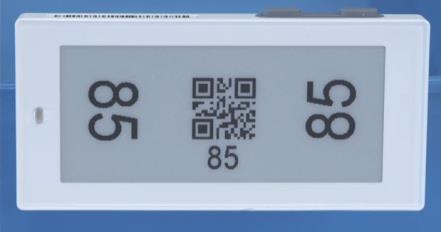
Manual assignment is used when the patient brings in the paper or electronic prescription to the pharmacy.
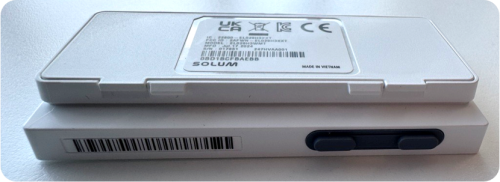
Below is an example of a tag from a digital basket that is ready to be assigned a prescription manually.
-
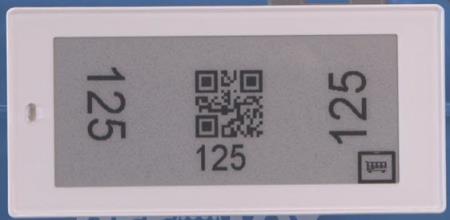
Automatic assignment is used when the patient orders the ePrescription remotely using any external baskets created by third-party integrators like MedView Patient Connect.
Below is an example of a tag from a digital basket that is ready to be assigned a prescription automatically.
Notice the icon in the lower right corner.
Set up a Digital Basket
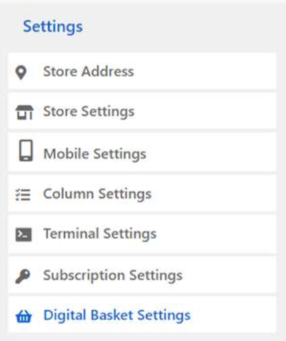
- Select the icon on the menu to display Settings.

-
Select Digital Basket Settings.
The existing digital tags are displayed.
Digital tags are the electronic component that clips onto a standard pharmacy basket to form a 'digital basket'.
-
Select Add New Tag.
-
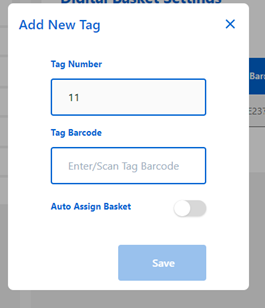
On the Add New Tag popup review or update the information as follows:
-
Tag Number: This is automatically incremented by MedView Flow. You do not need to enter anything here.
-
Tag Barcode: Enter the barcode on the digital tag. You can either enter it manually or scan the barcode.
-
Auto Assign Basket: Turn the toggle on to automatically assign this basket (for remote orders) or leave it off to manually assign this basket (for in-store orders).
-
-
Select Save.
View a list of Digital Baskets
- Select the icon on the menu to display Settings.

-
Select Digital Basket Settings.The existing digital tags are displayed.
Digital tags are the electronic component that clips onto a standard pharmacy basket to form a 'digital basket'.
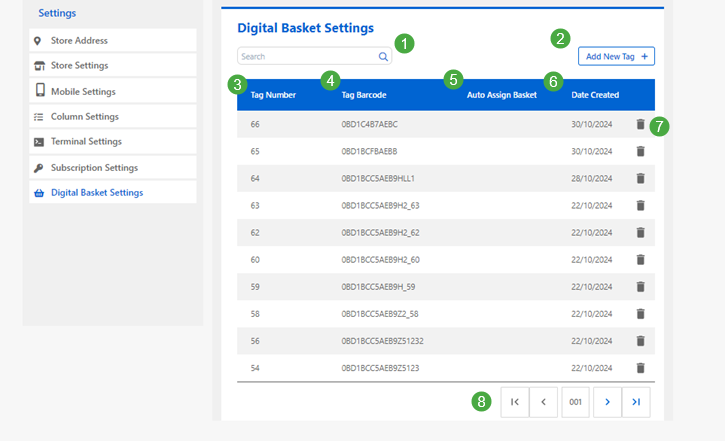
Number Description 1 Search for a tag. 2 Add New Tag. Select this to set up a new tag for a digital basket. See Set up a Digital Basket 3 Tag Number is the number that displays on the digital tag.
MedView Flow also displays this number on the electronic basket when a digital basket is assigned.

4 Tag Barcode is what is used to link the tags to MedView Flow.
5 Auto Assign Basket. If a green tick displays here, the auto assign setting is turned on so the basket can be used for remote orders. See What's the difference between manual assignment and automatic assignment? 6 Date Created. Date the tag was added to MedView Flow. 7 Delete. Click the trash icon to delete a tag that is not currently in use. 8 Pagination. Use the arrows navigate through the pages.
Delete a Digital Tag
You can delete a digital tag from the Digital Basket Settings page. This could be useful, for example, if you have set up your digital baskets with a certain number of auto assign and manual assign tags, but then discover that you actually need more of one kind of tag and less of the other. You can delete the digital tag, then add it back again choosing a different Auto Assign Basket setting.
Only delete digital tags that are not currently being used in MedView Flow. If you try to delete a digital tag that is assigned to an active MedView Flow basket, you will see the following error message.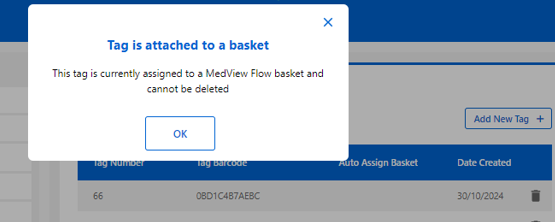
-
Select the icon on the menu to display Settings.

-
Select Digital Basket Settings.The existing digital tags are displayed.
-
Locate the digital tag you want to delete
You can search for a tag by number or use the arrows at the bottom of the list to navigate through the pages.
-
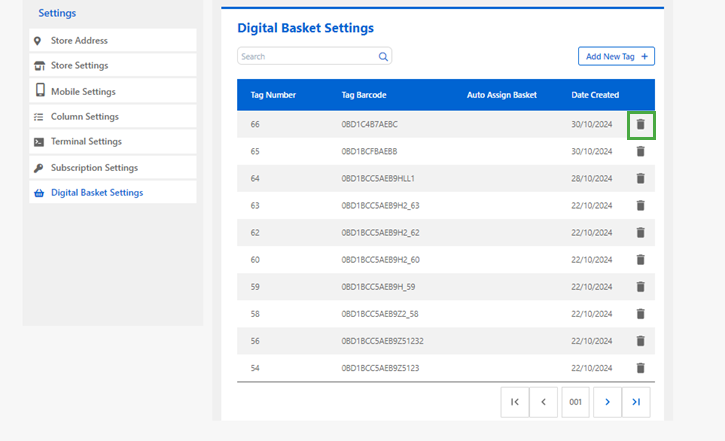
Click the trash icon .
-
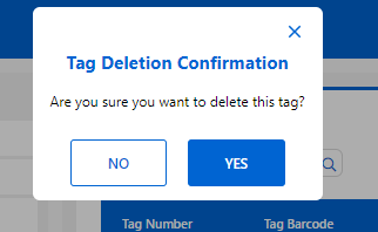
At the confirmation box, click Yes.
You can set the tag up again, if relevant, perhaps with different auto assign settings. The tag number will be different the next time you set it up.
