Activate the Paperless Uploader
The installation of Paperless Uploader (including moving the uploader to a different PC) must be done by a Support Consultant. There is a charge for the installation and configuration. Refer to Fred chargeable service fees for more information.
After you install the Paperless Uploader on a new PC, you must activate it in order to start uploading scripts.
Performing this procedure will cause the Paperless Uploader to stop working on any existing PCs in your pharmacy. You should only perform this procedure when you want to move your script scanner to a different PC.
In this topic
Step 1 of 2: In the MedView Paperless webapp, reset the Paperless Uploader activation
Step 2 of 2: On the PC with the Paperless Uploader installed, activate the Paperless Uploader
Step 1 of 2: In the MedView Paperless webapp, reset the Paperless Uploader activation
From the User Account menu (top right), select About.
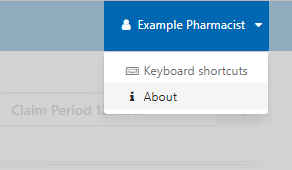
On the About window, under Useful Links, click Reset Paperless Uploader Activation.
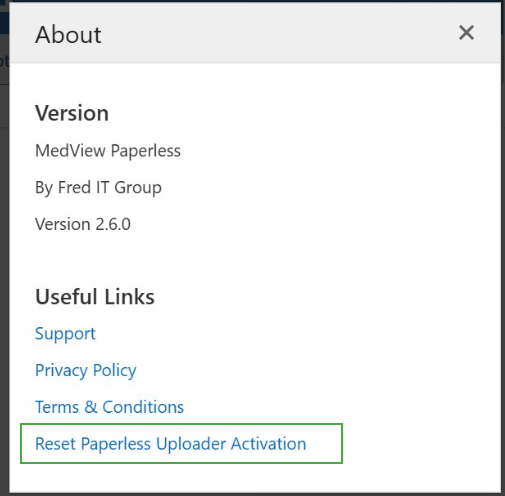
The Paperless Uploader window is displayed.
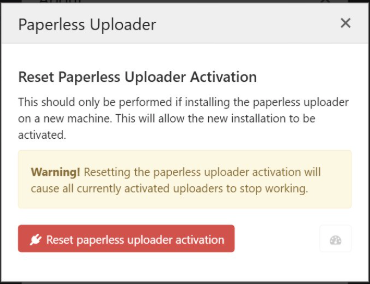
Click Reset paperless uploader activation.
A success notification is displayed.

Step 2 of 2: On the PC with the Paperless Uploader installed, activate the Paperless Uploader
Right-click the MedView Paperless icon in your Windows System Tray, then select Activate paperless uploader.
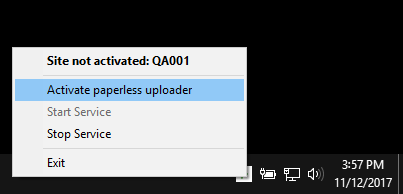
The Activate Paperless Uploader window is displayed.
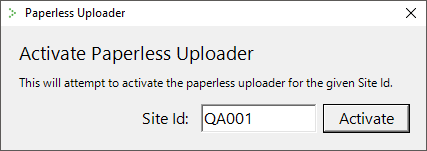
Click Activate.
A success message is displayed.
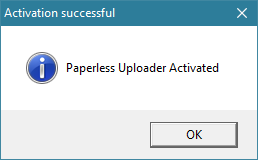
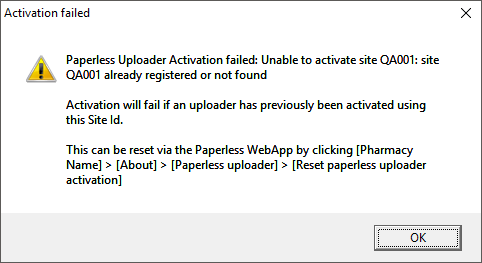
If an "Activation failed" message is displayed, try resetting the Paperless Uploader activation from the Paperless webapp (Step 1 in this topic) then activate the Paperless Uploader again (Step 2 in this topic). If the message continues to appear, contact MedView Support
